
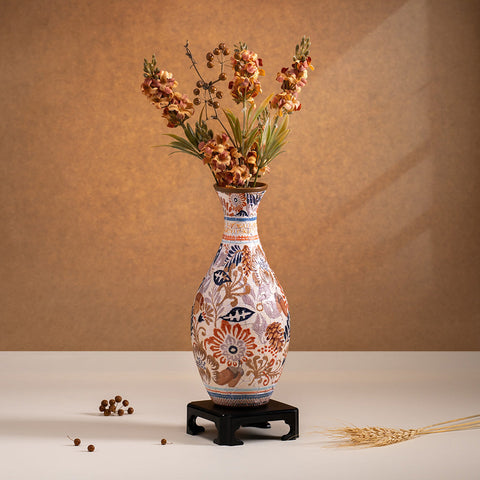
A 3D puzzle vase starts as a satisfying challenge and ends as something far better than a finished puzzle sitting in a box. When you know how to build a puzzle vase properly, each curved row clicks into place to create a sturdy, display-ready piece of décor - no glue needed. Add flowers, use it as a planter cover or let the artwork stand proudly on a shelf.
Unlike a flat cardboard puzzle, a premium plastic puzzle vase is designed to stay assembled. The pieces are durable, washable and made to interlock securely, so the finished shape has real presence. The trick is not speed. It is building in the correct order, keeping the curve consistent and allowing the base to do its job.
Before You Build Your Puzzle Vase
Choose a clear, flat table with enough room to sort pieces without losing them. A dining table, desk or coffee table works well. Avoid a soft bed or thick rug, where small pieces can sink out of sight and the vase can sit unevenly as it grows.
Open the box carefully and keep the packaging nearby. Most 3D puzzle vases include puzzle pieces, a base, a top ring or finishing piece, and sometimes an internal water cup. Check the included instructions before starting, because the number of pieces and assembly method can differ between designs.
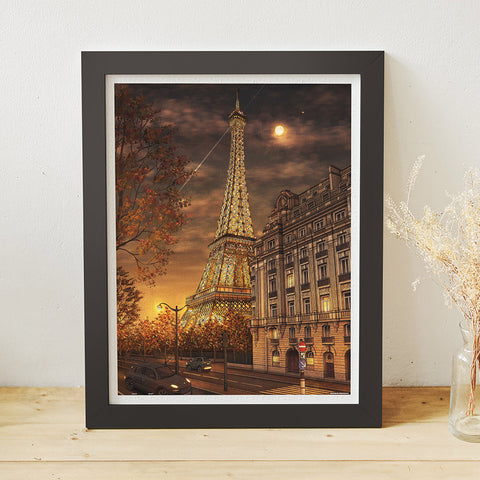
It is also worth deciding where the finished vase will live. A bright botanical design can bring colour to a kitchen bench, while a detailed art print makes a lovely talking point in a living room or office. Knowing its future spot makes the final reveal even more rewarding.
Sort first, then start clicking
Many puzzle vase pieces have numbers or subtle directional markings on the back. If yours does, sort them into numerical order before you begin. This is the easiest path for a first build and helps you understand how the vase curves upwards.
If you prefer a traditional puzzle challenge, build by image and shape instead. Separate recognisable colours, borders and distinctive artwork details, then work in short sections. This approach is more playful, but it can take longer because curved pieces may look similar from the front.
Do not mix the base and top components into your puzzle pile. Put them to one side until you need them. They are structural parts, not ordinary jigsaw pieces.
How to Build a Puzzle Vase Step by Step
Start with the base. Place it on the table with the receiving slots facing up, following the orientation shown in the instructions. The first few puzzle pieces form the foundation of the vase, so take extra care here. If the first row is misaligned, every row above it will feel more difficult.
Fit the opening pieces into the base one at a time. Premium plastic pieces should connect with a clean, positive click. Press gently with your thumbs near the joining tabs rather than bending the piece from the edge. If a piece resists, stop and check the number, direction and surrounding connections. Forcing it can stress a tab or create a twist in the row.
Once the first ring is complete, the vase will begin to hold its own shape. Continue upwards in the sequence indicated by the markings or instructions. Each piece should connect not only to the piece beside it, but also sit neatly against the row below. Keep the work on the table rather than lifting the vase too often while the upper section is still incomplete.
As you build, lightly run a finger around the outside of each finished row. You are checking for gaps, raised edges or a piece that has not fully seated. Catching a small mismatch early is much easier than pulling apart several rows later.
The last section often feels tighter because the curved wall is nearly closed. That is normal. Support the vase gently with one hand and press the final pieces into place with the other. Finish by fitting the top ring, rim or cap if your design includes one. This final component helps create a neat opening and gives the vase its polished silhouette.
If a piece will not fit
A stubborn piece usually means one of three things: it is upside down, it belongs in a nearby position, or an earlier piece has not clicked fully into place. Work backwards one or two pieces rather than trying to force the problem piece.
Check the back markings first if they are present. Then inspect the row below for a tab sitting on top of a neighbouring piece instead of locking into it. A quick correction can restore the curve straight away.
Never use glue, tape or rubber bands to hold a quality plastic puzzle vase together. These products are made for interlocking assembly and display without adhesive. Glue can mark the artwork, make future adjustments impossible and remove one of the best features of a reusable 3D puzzle.
Add Water and Flowers the Right Way
A finished puzzle vase may be water resistant, but always follow the instructions supplied with your exact model before adding water. If your vase comes with an internal cup or liner, use that for fresh flowers. It protects the puzzle structure and makes changing the water much easier.
Place the liner into the completed vase before adding water. Fill it away from the puzzle vase if possible, then carry it carefully back to its display spot. A small arrangement of fresh blooms, dried stems or leafy cuttings works beautifully, but do not overload the opening with heavy branches that could put pressure on the rim.
For a low-maintenance look, artificial flowers and dried botanicals are ideal. They let the puzzle artwork remain the hero and make a great option for bedrooms, workspaces or a gift that can be enjoyed straight away.
If you are using a puzzle vase as a planter cover, keep the plant in its own nursery pot or waterproof inner container. Water the plant separately and let excess water drain before returning it to the vase. This prevents moisture collecting where it does not belong.
Make Your Finished Vase Look Its Best
Part of the fun is choosing a display that suits the artwork. A patterned vase can brighten a neutral shelf, while a darker design can add depth beside books, candles or framed prints. Because the puzzle stays together without glue, it is ready to become décor as soon as you finish the last piece.
Give the outside a gentle wipe with a soft, slightly damp cloth if fingerprints appear during assembly. Avoid abrasive cleaners or rough scourers, which can dull a glossy surface. Keep it out of prolonged harsh sunlight if you want the printed colours to stay looking fresh over time.
Puzzle vases also make memorable gifts because they offer two experiences in one: the calm satisfaction of building and a useful finished piece to keep. For a birthday, housewarming, Mother’s Day or Christmas gift, add a small bunch of flowers or pair it with a favourite plant for a presentation that feels genuinely personal.
A Few Common Puzzle Vase Mistakes
The most common mistake is starting before checking the base orientation. The second is treating every piece like a flat jigsaw piece and overlooking the numbered assembly sequence. The third is trying to repair a gap by pressing harder. A quality puzzle vase should feel secure, not strained.
It also helps to build in a calm spot where the project can stay undisturbed. If you need to pause, leave the partly completed vase on its flat surface and keep loose pieces in a tray or box lid. This is especially useful for families building together, where the fun may happen over a few sessions rather than one afternoon.
A completed puzzle vase is proof that puzzling does not have to disappear back into the box. Take your time with the first ring, trust the interlocking design and enjoy watching a collection of individual pieces become a useful little artwork for your home.


Comments (0)
There are no comments for this article. Be the first one to leave a message!