
That satisfying final click deserves more than a trip back into the box. When you hang finished plastic puzzles, you turn a favourite pastime into colourful, personal home décor - without the mess, warping and permanence of traditional puzzle glue.
Premium plastic puzzles are made for this moment. Their firm, closely interlocking pieces hold together beautifully, so the image can move from the puzzle table to a wall, shelf or frame with confidence. Whether you have completed a detailed artwork, a bright family puzzle or a collectible design, the right display method keeps it looking crisp and gives your hard work the spotlight it deserves.
Why plastic puzzles are ready to display
A cardboard puzzle can be lovely, but it often needs glue, a backing board and plenty of careful handling before it can go near a wall. Plastic pieces offer a different experience. They are durable, water resistant and designed to lock together securely, making the finished puzzle far easier to lift and showcase.
That does not mean every completed puzzle should be hung exactly the same way. The best option depends on its size, weight, where it will live and whether you would like to take it apart one day. A compact puzzle in a calm hallway may suit a simple frame, while a large, high-detail artwork is better protected behind glazing. The display should suit both the puzzle and your home.
Before doing anything, leave the finished puzzle flat for a little while and check every edge. Press any raised corners gently into place on a clean, smooth surface. This small check makes framing easier and helps the finished image look polished from every angle.
How to hang finished plastic puzzles without glue
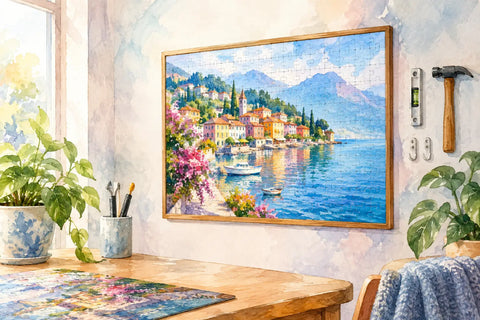
The easiest and most versatile approach is to frame the completed puzzle. A frame protects the surface from dust, accidental knocks and curious little hands, while creating a clean border that makes the image feel like proper wall art. Because plastic pieces stay together, you can usually lift the puzzle as one piece into the frame rather than bonding it permanently to a board.
Choose a frame that suits the completed dimensions, not just the stated piece count. Two puzzles with the same number of pieces can have very different finished sizes. Measure the puzzle from outside edge to outside edge once it is complete, then select a frame with enough internal room for a comfortable fit. A frame that is too tight can put pressure on the outer pieces and make fitting frustrating.
For a close, gallery-style finish, use a frame made for the puzzle’s exact dimensions. If you choose a larger standard frame, a mat board can create a neat border around the artwork. This works particularly well when the puzzle has a bold central image, a striking landscape or colours you want to echo in the room.
Place the frame face-down on a clean towel or soft blanket. Carefully position the puzzle inside, ideally with a second person helping for larger sizes. Fit the backing board, secure the frame tabs, then turn it over slowly to inspect the result. If the puzzle shifts while you lift it, do not force it. Lay it flat again and make sure the frame has adequate depth and support.
Once framed, hang it using the frame hardware and a wall fixing appropriate for its weight and your wall type. Plasterboard, timber and masonry all need different fixings. Heavy framed pieces deserve a proper picture hook or screw fixed securely into the wall, rather than a light-duty adhesive strip. It is a little extra effort that protects both your puzzle art and your paintwork.
Displaying a puzzle without glass
Some puzzle lovers prefer the clear texture and gentle sheen of plastic pieces without glass in front. An open-front frame or display tray can give you that effect, particularly in a low-traffic spot such as a study, bedroom or puzzle nook.
This option is best for puzzles kept away from cooking splatter, steam and direct sunlight. Water resistance is a wonderful practical benefit, but it does not make a finished artwork immune to dust, fading or everyday bumps. A dry microfibre cloth can remove light surface dust. Avoid harsh cleaners, abrasive cloths and soaking the completed puzzle while it is on display.
If you are displaying without glazing, make sure the frame or tray has a firm backing and a raised lip around the edge. The backing carries the weight, while the lip protects the perimeter from catching if someone brushes past it.
Pick the right spot before you hang it
A finished puzzle deserves a position where you will actually enjoy seeing it. Above a desk can make a home office feel more creative. A cheerful design can brighten a family room, while a calming illustration works beautifully in a bedroom or reading corner. A group of smaller puzzles can also create a playful gallery wall in a hallway.
Try holding the framed piece against the wall before making any holes. This helps you assess height, scale and colour. As a guide, artwork usually feels most natural when its centre sits around eye level, but furniture changes the equation. Above a console, sofa or sideboard, leave enough breathing space so the puzzle looks connected to the furniture rather than floating too high above it.
Be thoughtful about light. Direct sun can gradually fade printed artwork, even behind glass, so choose an area with indirect daylight where possible. Avoid walls exposed to persistent damp, such as beside a steamy bathroom, and keep valuable pieces clear of spots where doors swing open.
For renters or anyone who likes changing their décor often, lighter framed puzzles may work with removable picture-hanging products rated for the full weight of the frame. Always follow the product instructions and test the wall surface first. For a larger framed puzzle, a conventional wall fixing remains the more reassuring choice.
Make the frame part of the finished artwork
The frame is not only practical. It changes the personality of the puzzle. A slim black frame brings a modern graphic look to colourful illustrations and city scenes. Natural timber softens botanical, animal and landscape designs. White framing can make bright colours pop, while a metallic finish adds a collectable feel to a detailed fantasy or art-inspired piece.
Consider the room’s existing lines as well. A square puzzle can look fantastic in a tidy grid with photographs or prints, while a wide panoramic puzzle often shines best on its own. Give a detailed image enough visual space to be noticed. If a wall is already busy, one well-chosen puzzle in a simple frame will usually have more impact than several competing pieces.
At Puzzle Art Store, plastic puzzles are chosen for their display appeal as much as their satisfying click-together build. That makes them an easy choice when you want a gift that lasts beyond the unwrapping, or a mindful project that becomes part of the home.
What about 3D puzzle décor?
Not every finished plastic puzzle belongs on a wall. A 3D puzzle vase, planter, clock or globe is already designed to be part of your space. Let it do its job on a shelf, desk, bookcase or entry table instead of trying to frame it.
For these pieces, placement matters just as much as assembly. Keep functional puzzle décor on a stable, level surface away from the edge. If it will hold flowers, check the product instructions for its intended use and whether an inner container is required. A puzzle clock needs a clear view and enough room for its hands to move freely. These details keep the finished piece practical as well as eye-catching.
Give your completed puzzle a proper future
A finished plastic puzzle can be art, a conversation starter and a reminder of an afternoon well spent. Frame it for a clean, protected finish, choose hardware that suits the wall, and place it where the colours and details can be enjoyed every day. The final piece is not simply something you completed - it is something you created a place for.



Comments (0)
There are no comments for this article. Be the first one to leave a message!