
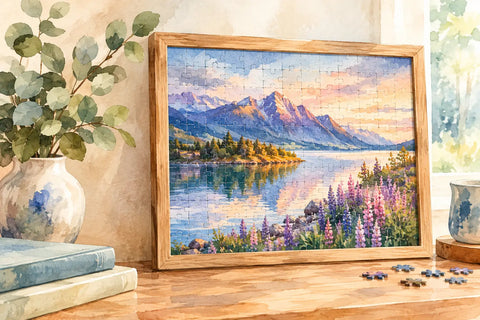
A completed puzzle deserves more than a quick photo on the dining table. The right puzzle frames turn hours of satisfying sorting, searching and clicking pieces into artwork you can enjoy every day. Whether it is a bold landscape, a favourite character scene, a detailed city view or a family-friendly design completed together, framing gives your finished puzzle a proper place in your home.
For puzzlers who choose premium plastic pieces, display is especially rewarding. The pieces hold together firmly, the surface is designed to last, and there is no need to cover your finished work in glue before it goes on the wall. That means less mess, more flexibility and a finish that looks clean from every angle.
Why frame a finished puzzle?
A jigsaw can be both a pastime and a piece of décor. Framing protects it from dust, bent edges, accidental bumps and the everyday chaos of a busy household. It also gives a finished puzzle a defined border, helping the image look intentional rather than temporary.
There is a sentimental side, too. A completed 1,000-piece challenge can mark a winter holiday, a family weekend or a puzzle you tackled one satisfying section at a time. A frame lets that achievement stay visible instead of being packed back into its box.
For gift buyers, this is where a premium puzzle becomes more than a present to open. Pairing a beautiful design with a frame-ready finish creates a gift with an experience built in, followed by artwork for a bedroom, lounge, study or bach.
Puzzle frames start with the correct size
The most common framing mistake is choosing a frame based on piece count alone. Two 1,000-piece puzzles can have completely different dimensions, so always measure the finished puzzle rather than relying on the number printed on the box.
Lay the completed puzzle on a flat surface and measure the full width and height from the outermost edges. Measure twice, particularly if the puzzle has an irregular edge or you have left a small gap between pieces while assembling it. Record the dimensions in millimetres as well as centimetres - this makes comparing ready-made frame sizes much easier.
A frame should fit closely enough that the puzzle will not slide around, but it should not squeeze or bow the completed design. If you are using a mat board, allow for the mat opening and the extra overall frame size. If the puzzle is an unusual size, a custom frame may give the neatest result, although it will usually cost more than an off-the-shelf option.
Check depth as well as width and height
Frame depth matters, particularly for plastic puzzles. Premium interlocking pieces can be thicker than standard cardboard pieces, so check that the frame rebate - the inner channel that holds the artwork and backing - has enough room for the puzzle, backing board and glazing.
A shallow frame may look sleek, but forcing a thicker puzzle into it can put pressure on the pieces or prevent the backing from closing properly. A deeper box-style frame can be a smart choice for textured designs, dimensional puzzle art or anyone who wants a more substantial gallery look.
Choosing the right frame material and finish
The best frame is the one that suits both the puzzle image and the room. A clean black frame gives colourful artwork contrast and works beautifully in modern spaces. Natural timber tones bring warmth to botanical scenes, maps and calm illustrated designs. White frames can make bright, playful puzzles feel fresh in a child’s room or creative corner.
For the front panel, acrylic is often a practical option. It is lighter than glass and less likely to shatter, which is useful for homes with children, rental walls or larger pieces. Glass can offer excellent clarity and a more traditional framed-art feel, but it is heavier and needs more care when hanging. Anti-glare glazing is worth considering if the puzzle will hang opposite a window or under strong overhead lighting.
Do not overlook the backing board. A firm, flat backing keeps the puzzle supported and helps it stay looking polished over time. Choose acid-free materials where possible if you are framing a collectable design or a puzzle you expect to keep on display for years.
No glue needed with premium plastic puzzles
Traditional cardboard puzzles often need glue, adhesive sheets or mounting tape before framing. That process can be fiddly, permanent and a little risky - especially if glue seeps between pieces or changes the surface finish.
With quality plastic puzzles that lock firmly together, you can often frame the completed design without glue. This is a major display advantage. You retain the clean piece definition, avoid sticky residue and can remove the puzzle from the frame later if you decide to rebuild it or refresh your wall display.
That said, the exact approach depends on the puzzle’s construction and the frame fit. If the frame is slightly oversized, use a snug backing board and carefully position the completed puzzle so it cannot shift. Avoid taping directly across the front of the design. If you need extra stability, secure the backing system rather than permanently attaching the puzzle itself.
How to move a completed puzzle into a frame
The transfer is the moment that makes many puzzlers nervous, especially after finishing a large piece count. Take your time and prepare a clear, flat workspace before you begin.
Start by making sure every piece is fully connected. Place a rigid board or puzzle mat over the front, then slide another board underneath the puzzle to create a sandwich. Hold both boards firmly together and turn the puzzle over in one controlled movement. With the back facing up, position the frame backing board against it, then carefully flip the whole assembly again if your frame design requires it.
For a lightweight plastic puzzle with tight-fitting pieces, this process is usually far easier than handling a loose cardboard puzzle. Still, do not rush. Keep pets, little helpers and cups of tea away from the work surface until the frame is closed.
Make your puzzle display look considered
A framed puzzle can hold its own as a statement piece, but it also works brilliantly as part of a wall arrangement. Choose the location based on the artwork’s mood. A vivid travel scene can brighten a hallway, while a detailed artwork puzzle suits a quiet reading nook. Kids’ puzzles look fantastic at child height in bedrooms or play spaces, where the finished image becomes part of the room’s personality.
If you are creating a gallery wall, repeat one or two elements for a cohesive look. You might use matching black frames in different sizes, or pair timber-framed puzzles with prints in similar colours. Leave breathing room between frames so intricate puzzle imagery is easy to appreciate from a distance.
Avoid hanging your puzzle in direct, harsh sunlight for long periods. Even durable materials benefit from a little protection, and reducing glare makes the image easier to enjoy. In kitchens, bathrooms or humid areas, make sure the frame is properly sealed and mounted away from steam and splashes.
When a frame is not the best display option
Not every finished puzzle needs to live behind glass or acrylic. Some designs are made to become something more interactive, such as a 3D vase, planter, clock or globe. These pieces deserve pride of place on a shelf, desk or sideboard where their shape and function can be enjoyed.
You may also prefer a puzzle stand for a smaller design, or rotate unframed favourites through a display board. Framing is ideal when you want a permanent artwork effect, but a flexible display approach can be better for collectors who love completing new designs regularly and have limited wall space.
At Puzzle Art Store, the appeal is simple: premium puzzles are made to be enjoyed twice - once while you build them, and again when you display them. Choose a frame that fits well, supports the puzzle properly and suits your space, then let your finished masterpiece keep telling its story long after the final piece clicks into place.
Comments (0)
There are no comments for this article. Be the first one to leave a message!